Coding the Web Part
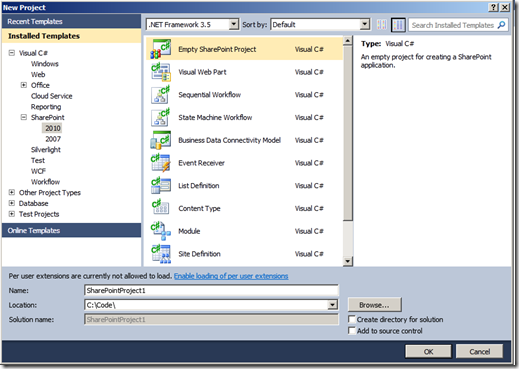
Here is where things start to change. Instead of creating a class library and adding references to the SharePoint DLLs, we simply use one of the new included SharePoint project templates as you can see here.
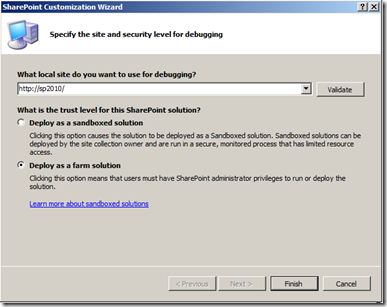
Start by using the Empty SharePoint Project template. Also make sure you have it set to .NET Framework 3.5 as SharePoint does not run under .NET Framework 4.0 (don’t get me started). You’ll notice you have many different project templates to choose from. Most of these can also be used once you create an empty project. On the next dialogue, pick farm solution. I’ll go into the difference between sandboxed and farm solutions, but more than likely you are going to use farm solutions every time. You also need to specify the URL to your server. You can change that if you want but the default value will probably work for you in this case.
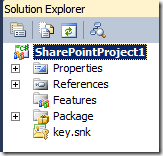
This gives us a solution that looks like this.
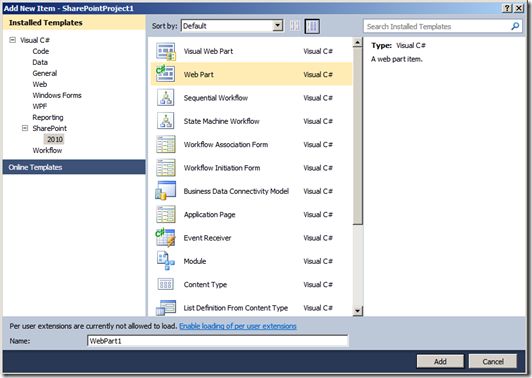
Now we are ready to build our new web part. If you bring up the add new item context menu, you will see a number of choices for the types of new SharePoint Project Items (SPIs) that you can create. We’re going to choose Web Part in this case.
What is the Visual Web Part you ask? That’s just a user control which relates directly to my second most popular post on How to Deploy a User Control. Now we’re finally ready to add some code. We’re just going to take our code from the WSS3 post and use it here.
using System;
using System.ComponentModel;
using System.Runtime.InteropServices;
using System.Web.UI;
using System.Web.UI.WebControls;
using System.Web.UI.WebControls.WebParts;
using Microsoft.SharePoint;
using Microsoft.SharePoint.WebControls;
namespace SharePointProject1.TestWebPart
{
[ToolboxItemAttribute(false)]
public class TestWebPart : WebPart
{
public TestWebPart()
{
}
protected override void CreateChildControls()
{
base.CreateChildControls();
Controls.Add(new Label() { Text = "My Test SharePoint 2010 Web Part (Hello World)!" });
}
protected override void RenderContents(HtmlTextWriter writer)
{
base.RenderContents(writer);
}
}
}
The only line of code I added here was the line to add the label and set its text. Everything else came from the template.
Describing the Web Part
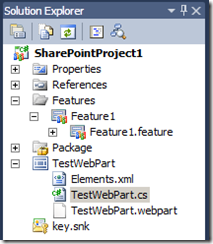
In my WSS3 post, this is where I talked about building a .webpart file. Well, you don’t need to worry about that any more as Visual Studio creates it for you. Here is what solution explorer looks like after you add your first web part.
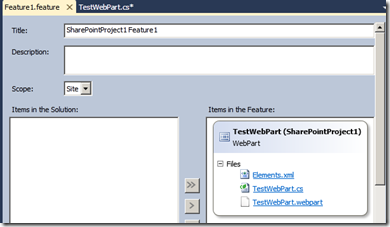
As you can see the .webpart file is already there as well as an elements.xml file for a feature to deploy the web part. The WSS3 post went on to talk about all of the things you need to know about building a feature. This is still good stuff to know, but its already taken care of for you. If you want to edit the basic feature information, just open it up in solution explorer and you get a nice new interface that looks like this.
I’m not going to waste space showing you the insides of the files it creates for you. Just know it creates them for you and it saves you a ton of time.
Deploying via Solution Package
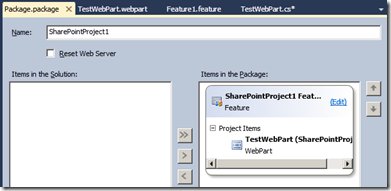
In my WSS3 post, I explained how to create a cab.ddf and manifest.xml file. Well guest what? That is taken care of for you now as well. The Package.package file in the solution explorer provides another nice editor which allows you to choose with files go into the package. You don’t have to keep track of a thing any more, it just builds the package and takes care of it for you.
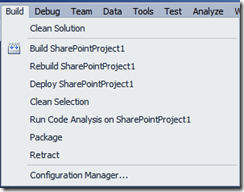
At this point, Visual Studio has created the .webpart file, the feature, and the solution package. However, we still need to deploy it and if we could debug it that would be even cooler right? Take a look at our new options in the Build menu.
We can build and rebuild just like any other project, but notice the options for Deploy, Package, and Retract. Those are all SharePoint functions. In this case, I want to deploy my solution. Choosing deploy, we see the following in the output window.
------ Build started: Project: SharePointProject1, Configuration: Debug Any CPU ------
SharePointProject1 -> C:\Code\SharePointProject1\bin\Debug\SharePointProject1.dll
Successfully created package at: C:\Code\SharePointProject1\bin\Debug\SharePointProject1.wsp
------ Deploy started: Project: SharePointProject1, Configuration: Debug Any CPU ------
Active Deployment Configuration: Default
Run Pre-Deployment Command:
Skipping deployment step because a pre-deployment command is not specified.
Recycle IIS Application Pool:
Recycling IIS application pool 'SharePoint - 80'...
Retract Solution:
Skipping package retraction because no matching package on the server was found.
Add Solution:
Adding solution 'SharePointProject1.wsp'...
Deploying solution 'SharePointProject1.wsp'...
Activate Features:
Activating feature 'Feature1' ...
Run Post-Deployment Command:
Skipping deployment step because a post-deployment command is not specified.
========== Build: 1 succeeded or up-to-date, 0 failed, 0 skipped ==========
========== Deploy: 1 succeeded, 0 failed, 0 skipped ==========
From inspecting the text of the log, you can see that Visual Studio compiled, created a package, reset my Application Pool, Added the Solution, Deployed the Solution, and activated the feature. Let’s check SharePoint and see if it’s really there.
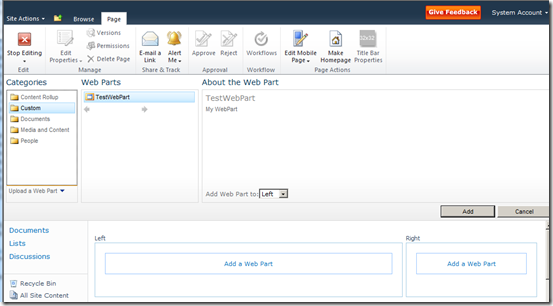
Checking the web part gallery, we see our .webpart file. Let’s add it to a page and see how it looks. Edit any page and use add a web part and you will see the new interface for choosing a web part. It puts it in the Custom group by default.
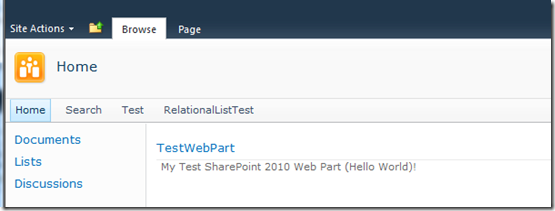
One you hit and add finish editing, we see the web part working correctly.
You have to admit this is quite a bit easier than deploying a web part in SharePoint 3. What if you want to debug though? No problem. Just set a breakpoint and choose debug from the build menu like you would any other type of project.
As I mentioned earlier, if you are familiar with SharePoint 2010, this is nothing new to you. However, my point today is for those who shied away from SharePoint in the past because the development experience was far from optimal. Try it for yourself and you will see how easy it is to get up and running with your code. Even with pictures this post is half the size of the WSS3 post. That’s because it really is just that easy. I really think Visual Studio 2010 will open the way for a new round of SharePoint developers. Try it out today.
